Forward to the completed Zuiho Images
Captain’s Log: Winter of 2017/2018
The final phase of this build was completing all the highly detailed parts of the ship. These included: the single, dual and triple 25mm mounts, the five main antennas; the 25mm ammo boxes; the secondary horizontal antennas and other misc items. Oh, and twelve 1/100 A6M5 52 Zeros in wood…
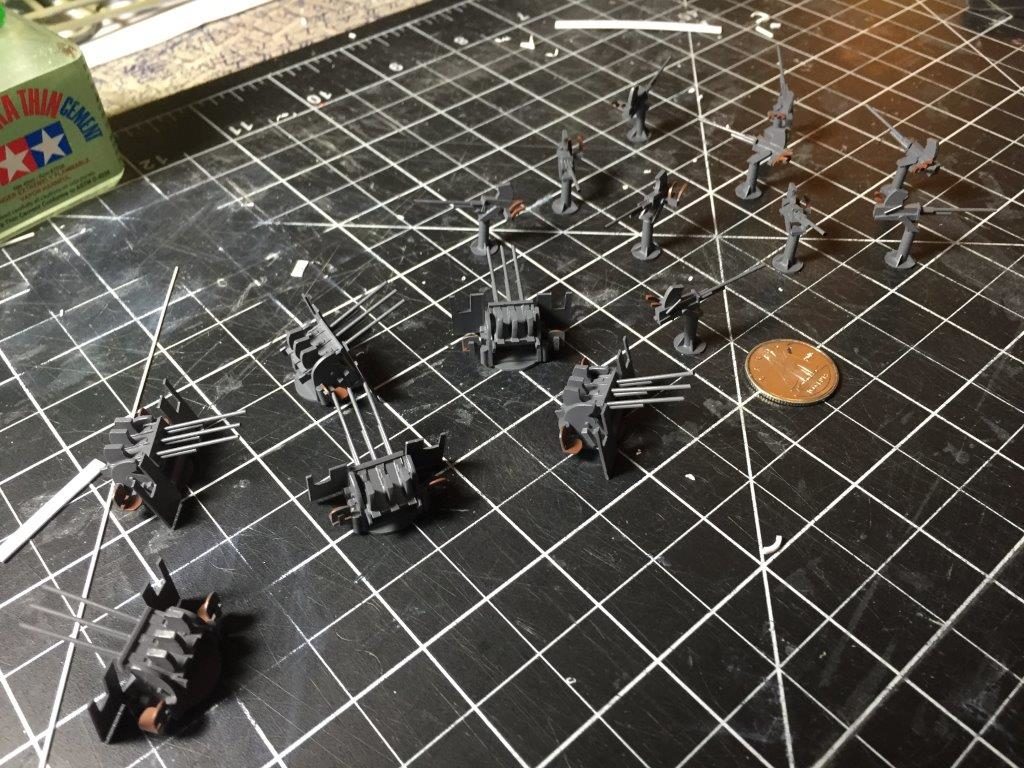
The dual mounts 25mm guns were completed first because they were the fewest in number (4). It was frustrating at times working in such detail and I told a friend that had I done them first I probably would have abandoned the whole project. Fortunately, with the experience gained while building other parts of the ship, and the ship having all these empty spots needing guns, I was able to plow through. The 4 dual mounts ended up only taking me about 4 hours to complete, including painting them.
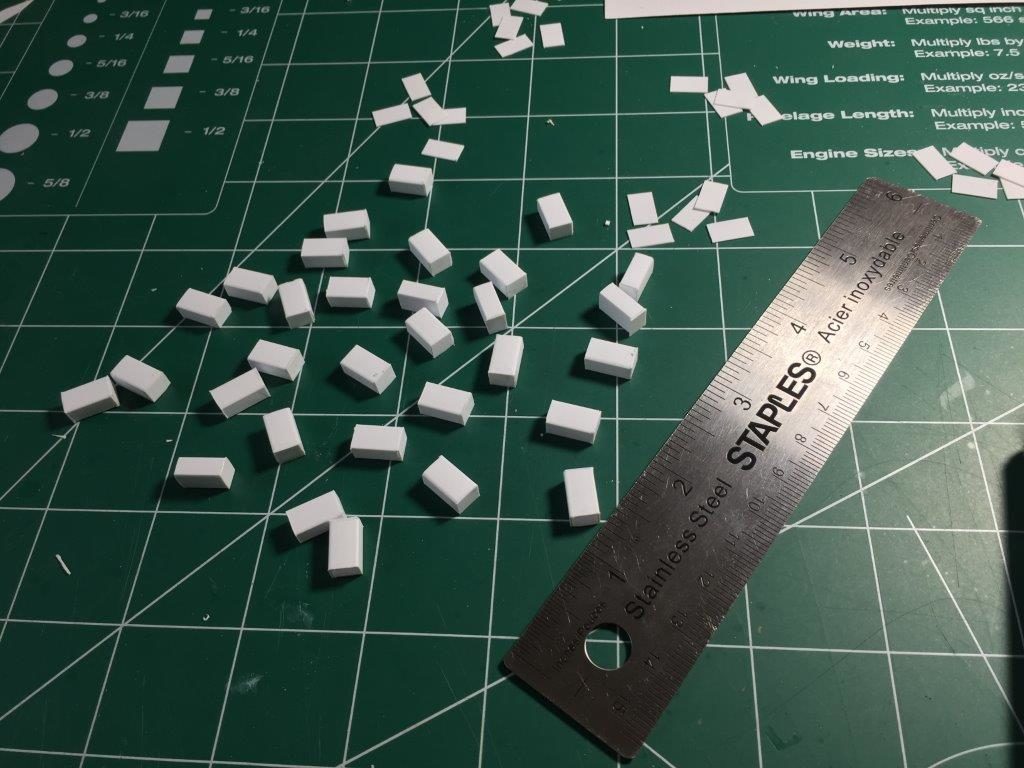
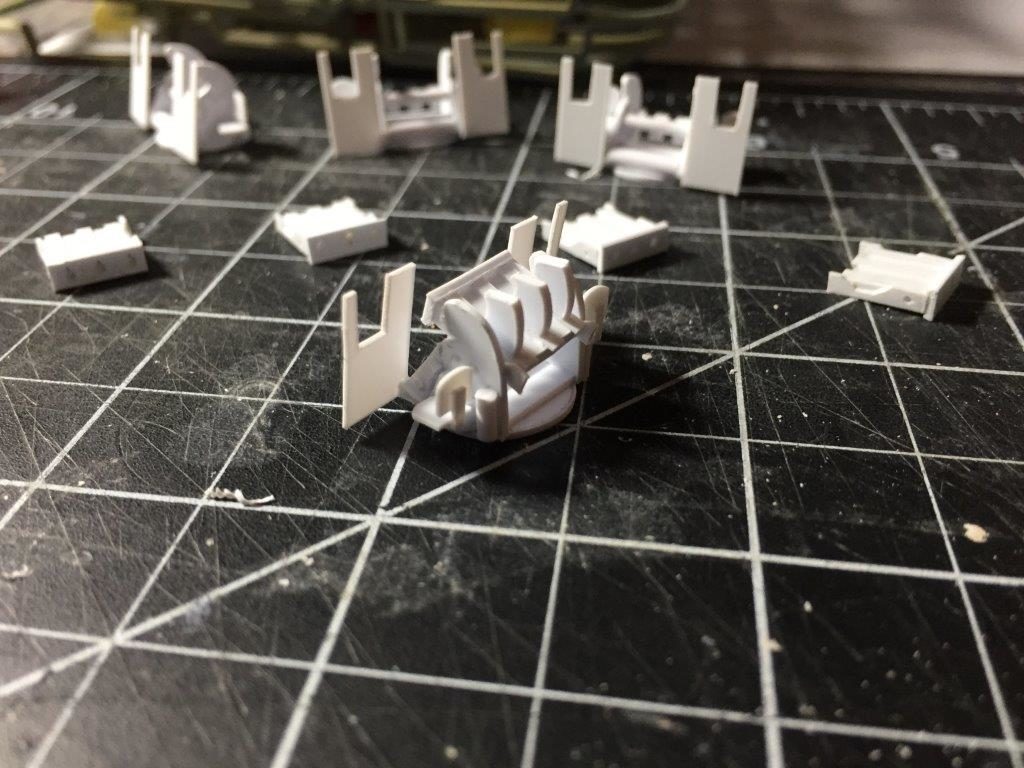
Next I moved on to the ammo boxes for the 25mm cartridges. These were plentiful and came out nice. They add a touch of detail to the kit.
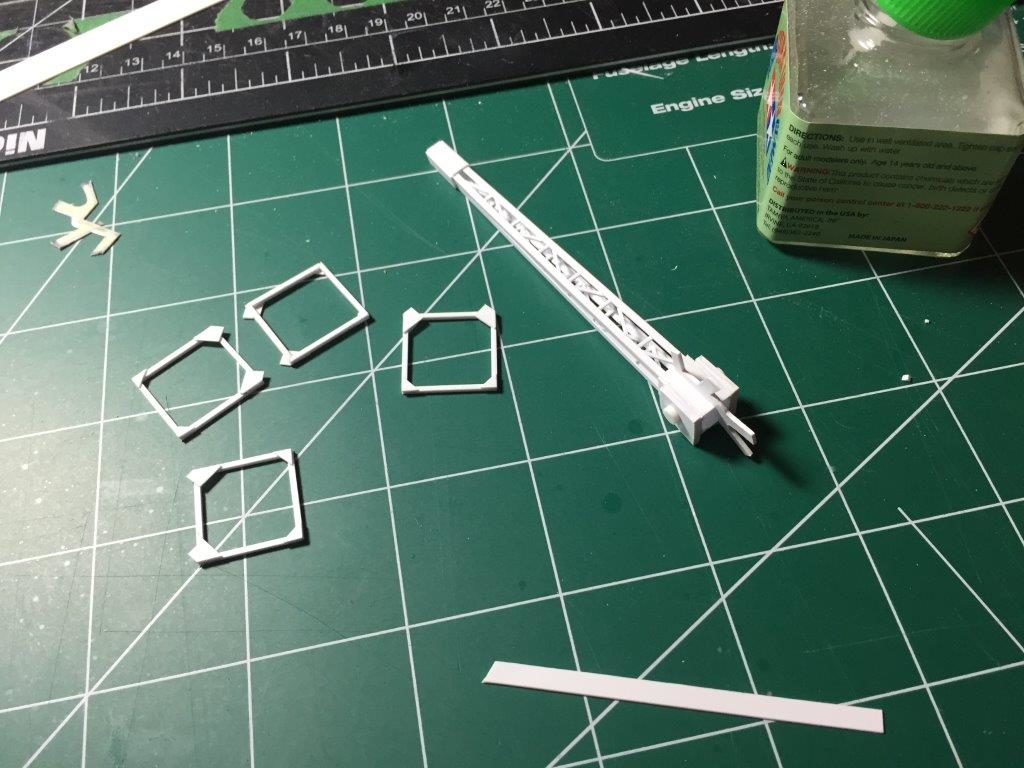
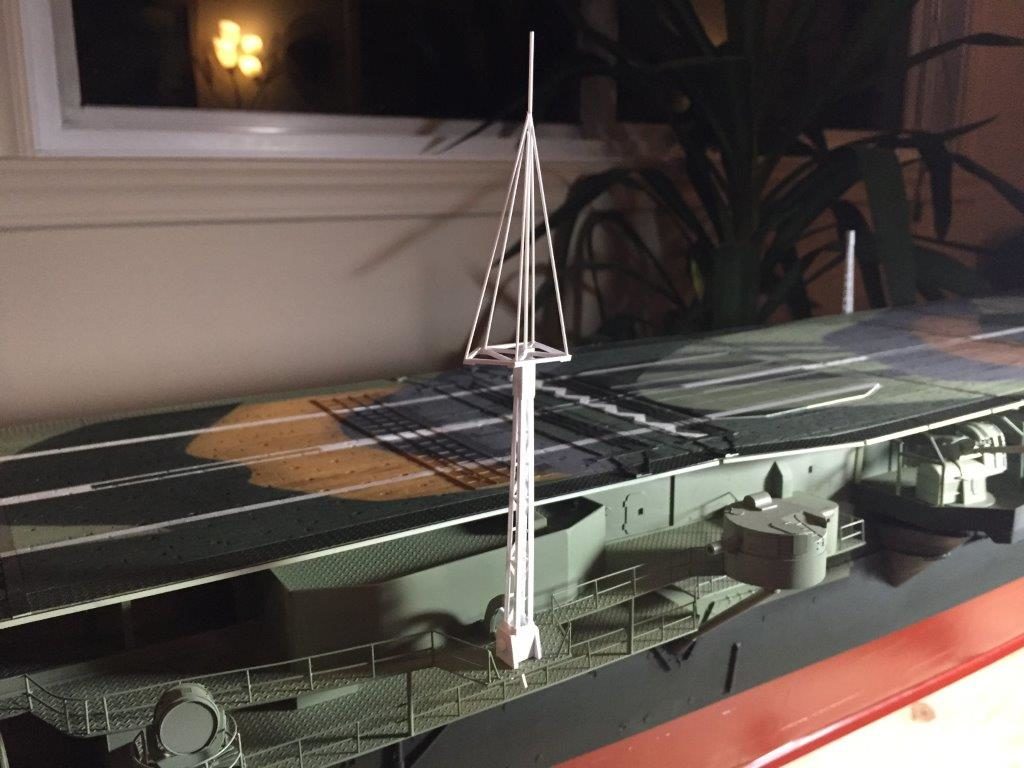
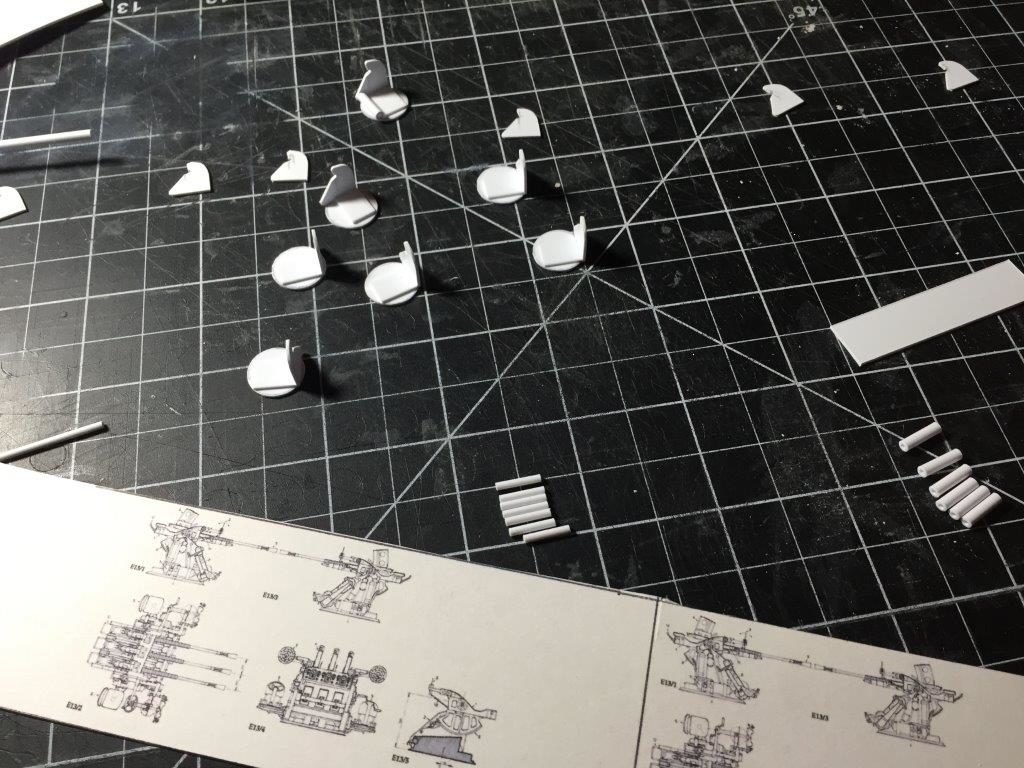
The 5 main antennas required a delicate touch and quite a bit of patience. As with any items I needed to build that had more than one example required, I incorporated the assembly line practice: Cutting the requisite number of strips and pieces needed for each component before assembly and then gluing the same piece 5 times. This makes the individual antenna take longer to build, but then all five are exact replicas and are finished simultaneously. The only negative to doing this practice is if you make an error in cutting or assembly, then you have to repair or correct the same error 5 times. Luckily, I never encountered any major errors that required major deconstruction in all the instances I incorporated the assembly line practice. The foremost port side antenna also had a Type 13 Go radar. The AOTS Takao book provided me with the detailed drawings to complete it quickly.
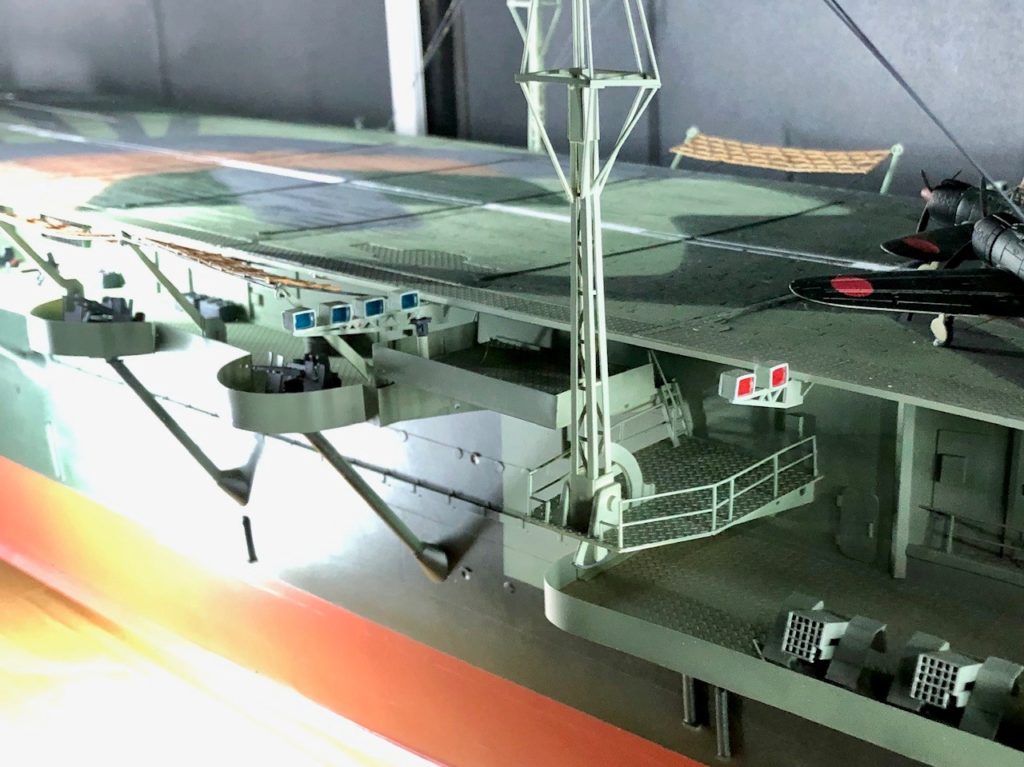
The four landing assist lights and their scaffolds were designed and built next. They came out nicely and I sprayed the blue and red paint on one side of clear styrene and then glued them into place with the painted side on the inside. This gives the impression that they are glossy. This saved me from needing to buy entire transparent sheets of red and blue styrene, since I only needed about 2″ square of translucent styrene for each of the two colours.
I built the two goniometers out of metal wire / rods and I also built 8 sets of binoculars and their pedestals. All these little features really help to provide the viewer with scale and detail perspectives.
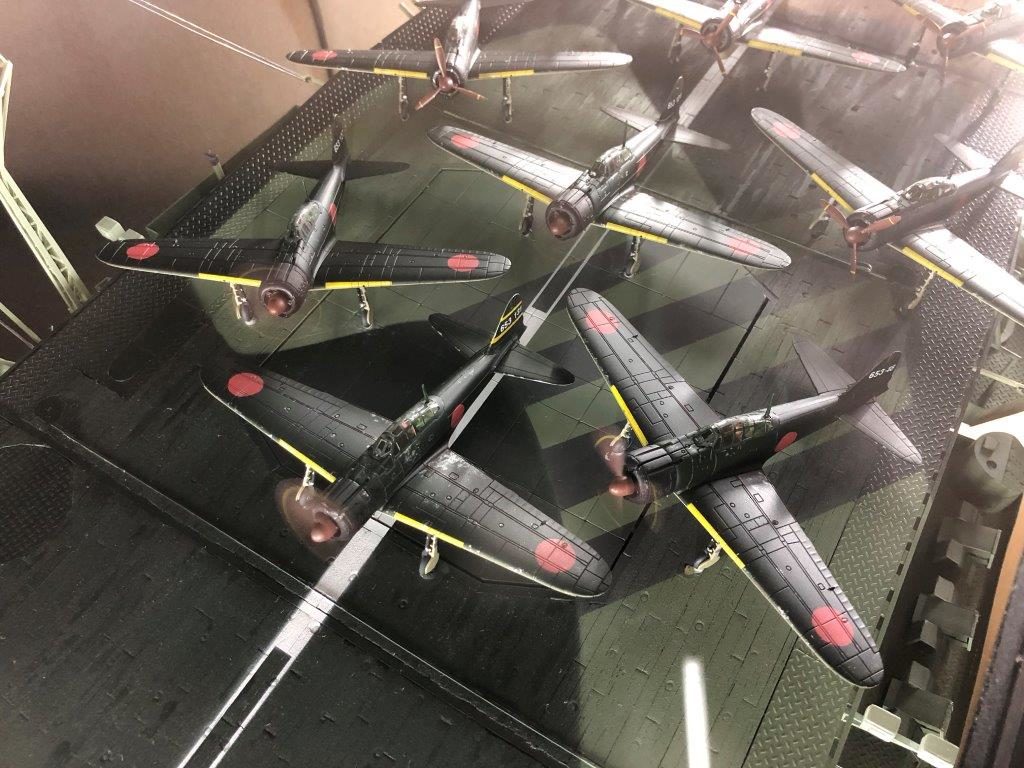
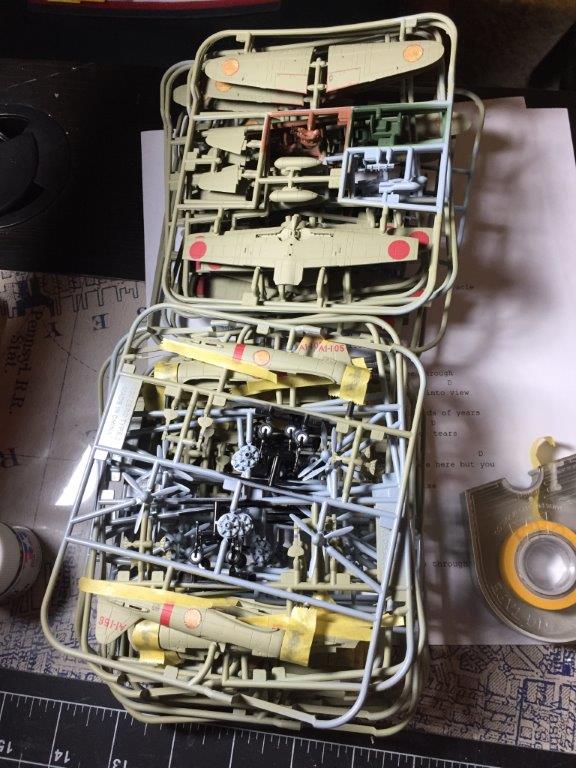
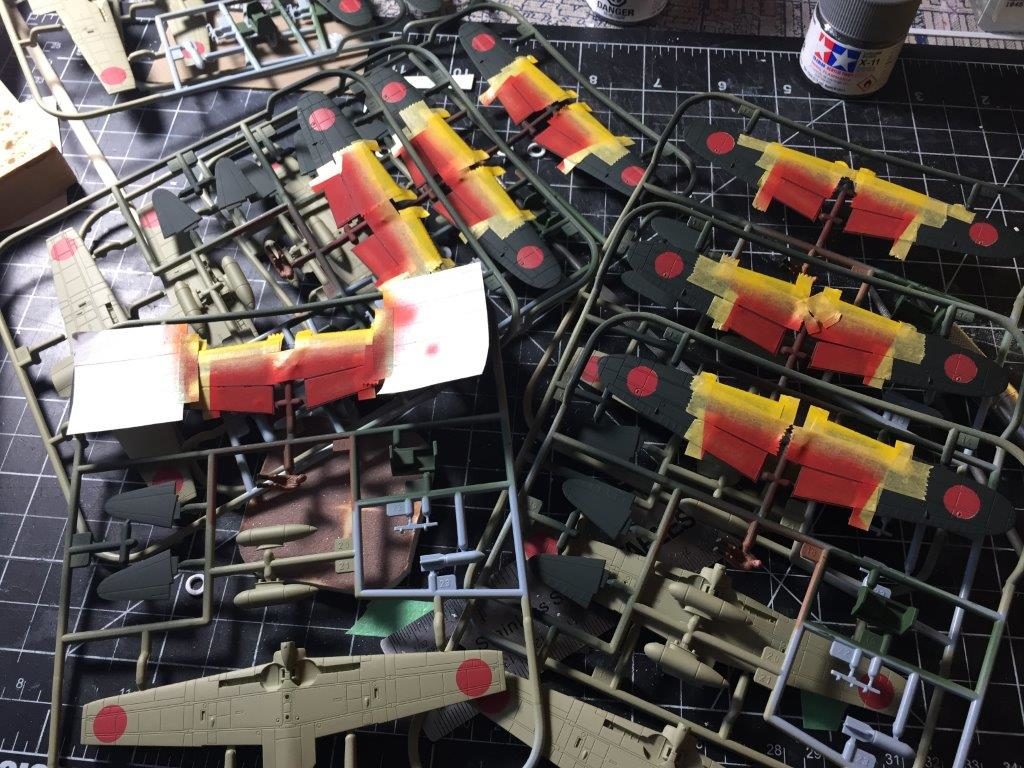
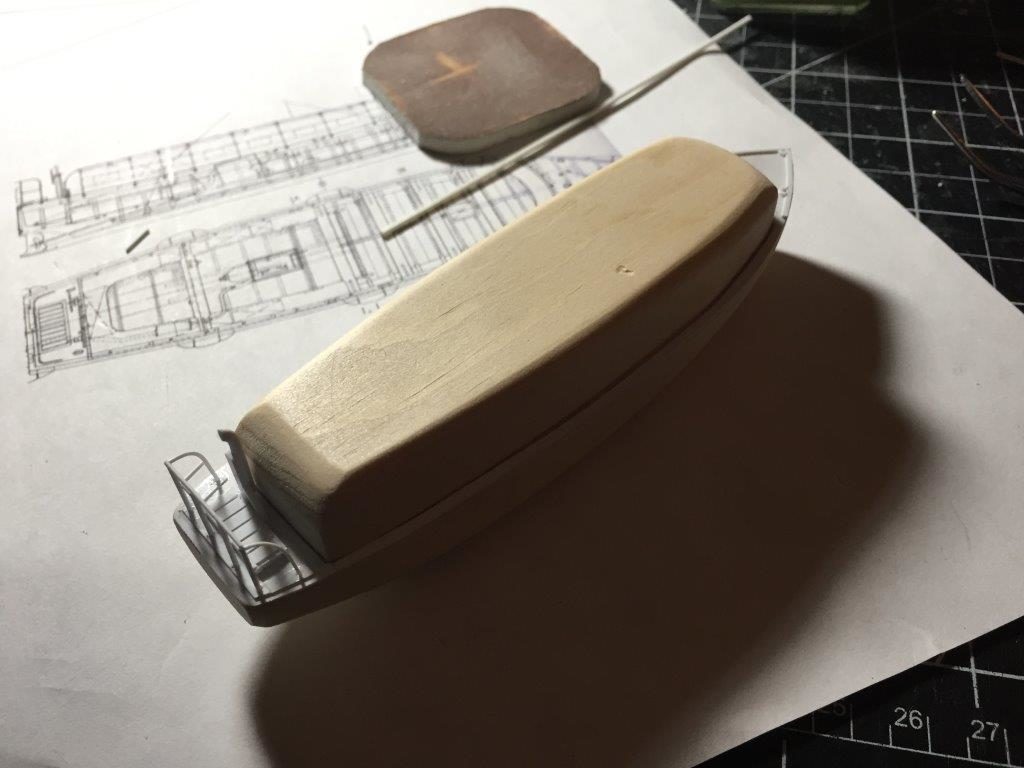
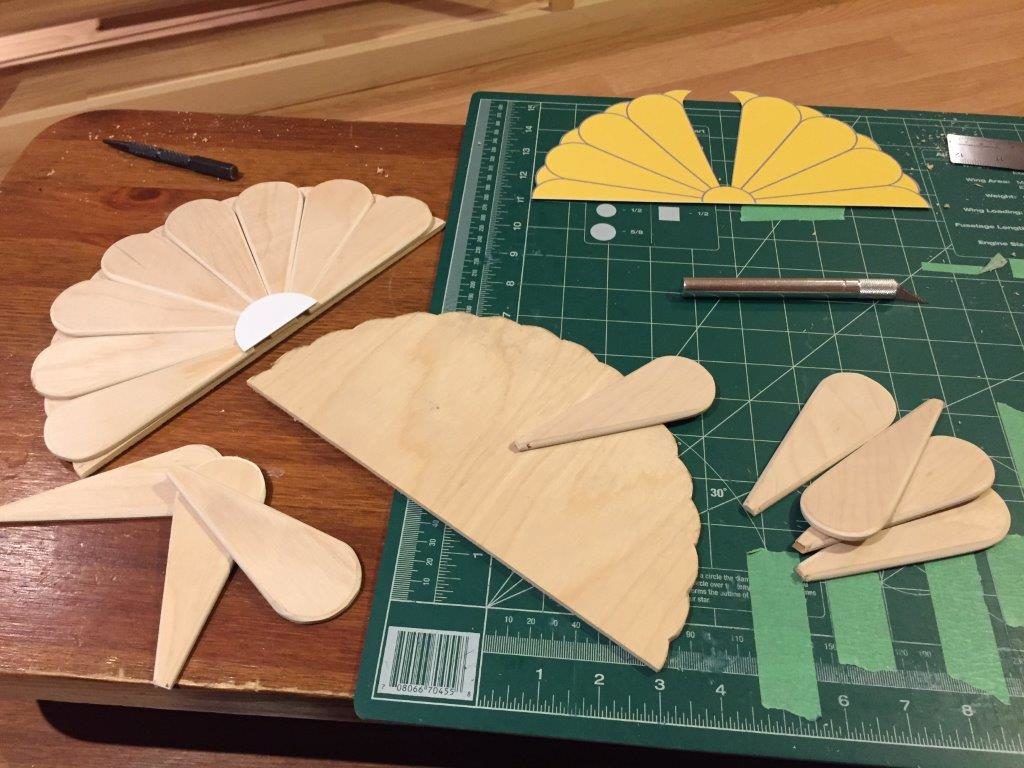
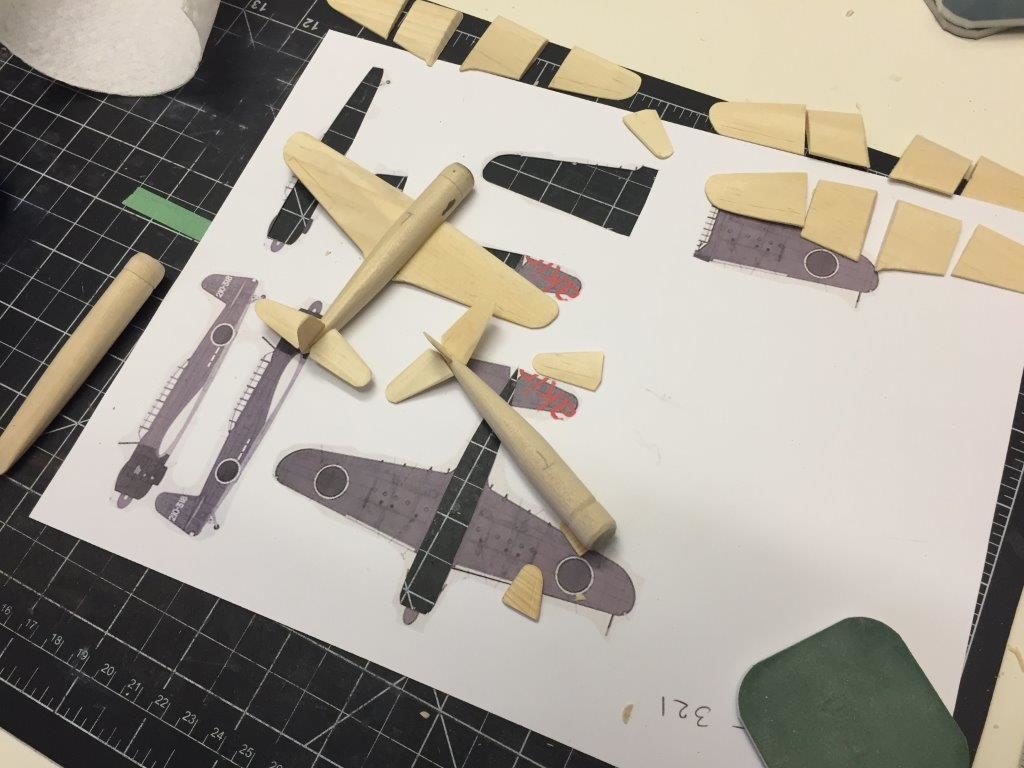
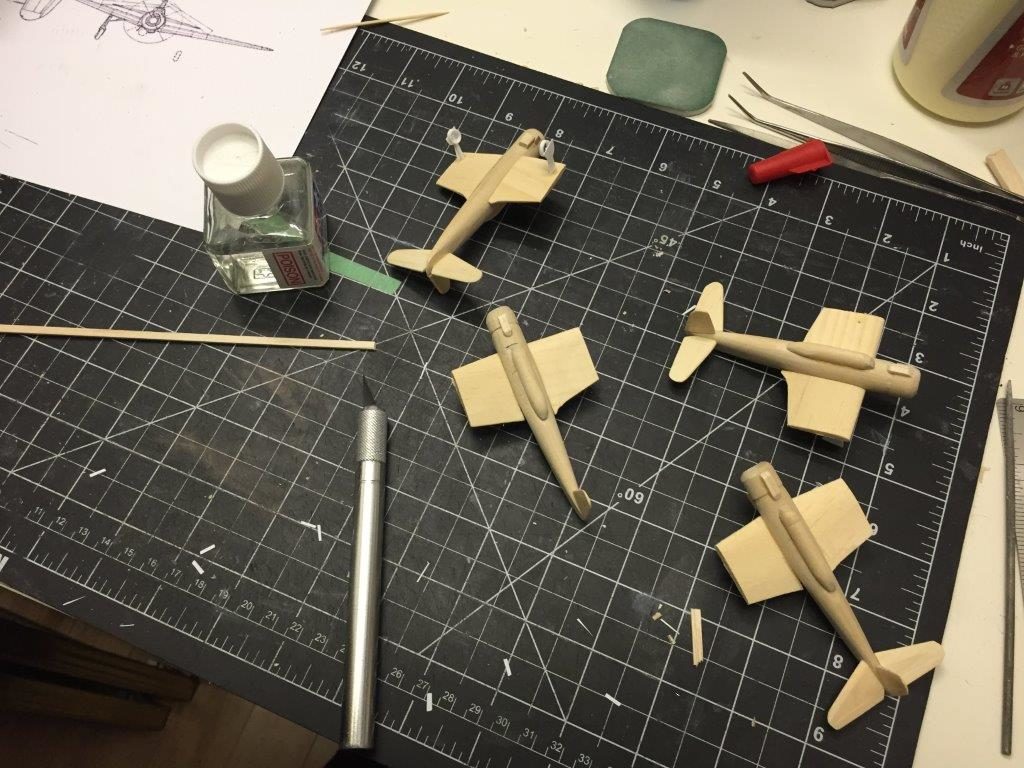
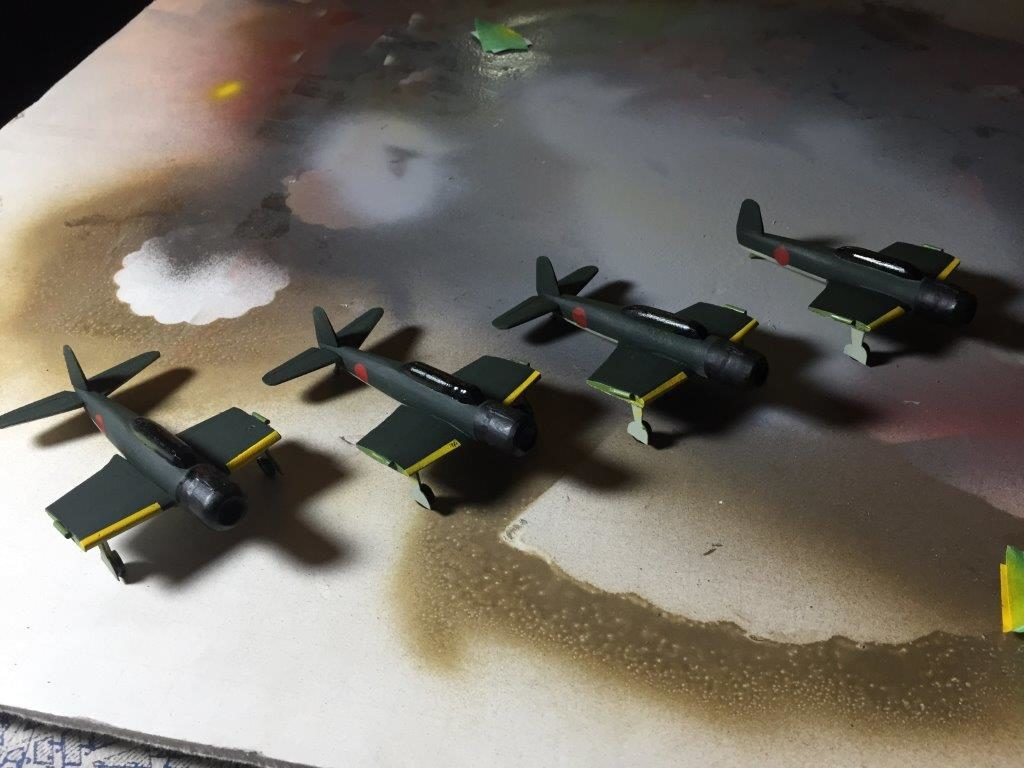
The Aircraft: Next I decided to tackle the 12 x A6M5 52 Zero fighters for the ship. I attempted to build the Zeros using pine. Although the first one came out “good”, it was clearly made of wood. No matter what I did I could not get the wooden model to look less “clunky”. I did not want the aircraft on the ship to look unrealistic after working so hard to make the Zuiho as realistic as possible. I contacted HLJ.com and ordered the Doyusha 1/100 Zero “medley”. This box set had 12 planes of different types (21, 22, 52 etc) in different paint schemes. The kit was back ordered. Long story short, after several months of waiting I found out the kit was discontinued. I was a little disappointed. What was I to do? Doyusha also has a set of six Type 21 Zeros from the carrier Akagi in 1/100. I decided to order two sets and they arrived within two weeks. I now had my air wing for the Zuiho, albeit I needed to repaint them and try to transform them into the type 52 versions of the Zero. Ultimately, I decided there were too many differences between the type 21 and type 52 to successfully convert them (the most blatant difference is that the Type 52’s wingspan was 1/2 meter shorter per wing, and the engine cowlings/exhaust are noticeably different). I have left them as Type 21, but they are painted as they would have appeared on the Zuiho in Oct 1944. If ever the Type 52 Zeros are restocked at HLJ.com I will update the air wing completely. For now, the planes on hand will have to suffice. I will say that the Doyusha 1/100 planes are really detailed and easy to build; with no flash and the parts fit together snuggly. Additionally, four of the planes come with motors to have the propellers turn: A nice little feature that I have decided to incorporate into my display case. The 12 planes were painted and the paint was worn on each to different degrees. My thinking was that knowing the poorer quality of the pilots at this stage of the war, there would not be many aircraft that were old enough to have their paint really worn down. A plus of these kits is that each plane came with oil drums which I assembled and placed at specific locations around the ship and in the hangar. Another plus of these two kits is that each aircraft comes with several crewmen and pilots (7 figures * 12 kits). Previously, I had tried to find figures in the 1/100 scale and the only figures I found were HO scale, which were too large.
By mid-January 2018 I was actually running out of things to do, if you can believe it! My “to do” list, which was originally about 2,000 items long, was down to the last 10 items or so. It was pretty exciting and actually a little sad: So much time and effort and the end was suddenly so close. It was a surprising realization.
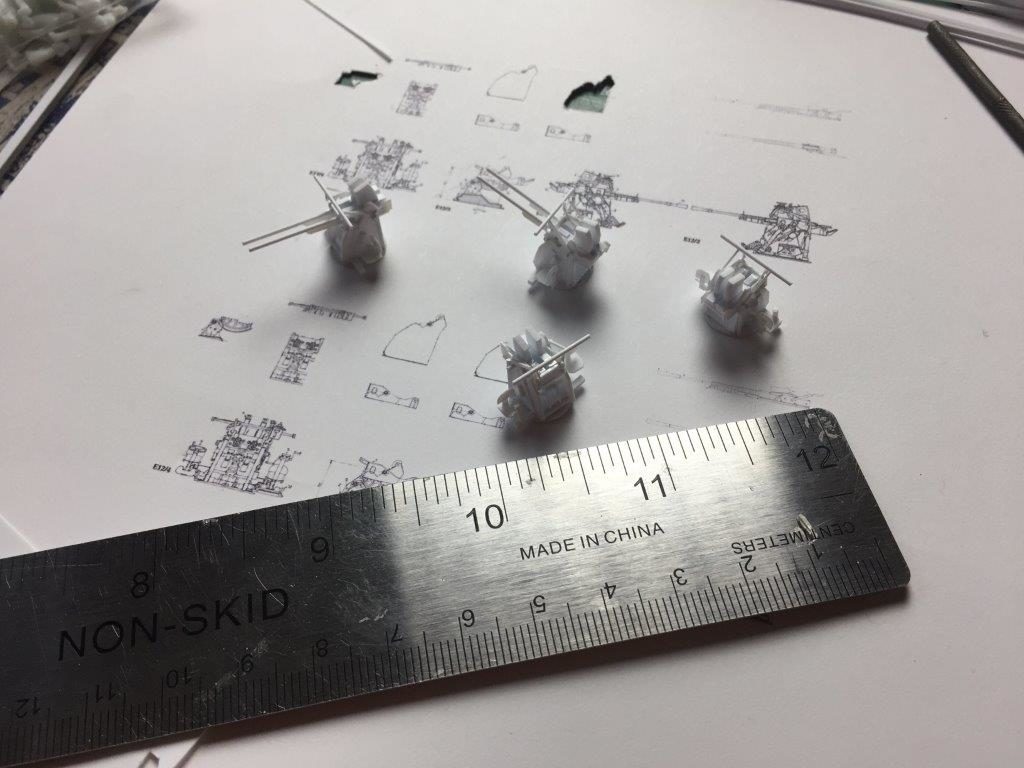
Next I got down to producing the 7 x triple 25mm open mounts and 10 of the single 25mm mounts. I settled on only 10 because I was not going to depict the portable single 25mm guns, since they would have been attached to the flight deck when there were no aircraft operations underway. Since I am depicting the Zuiho with 12 aircraft on deck, then these 25mm sleighs would have been stowed below. The building of these small guns was time consuming but all 17 of them were completed over the course of 2 days.

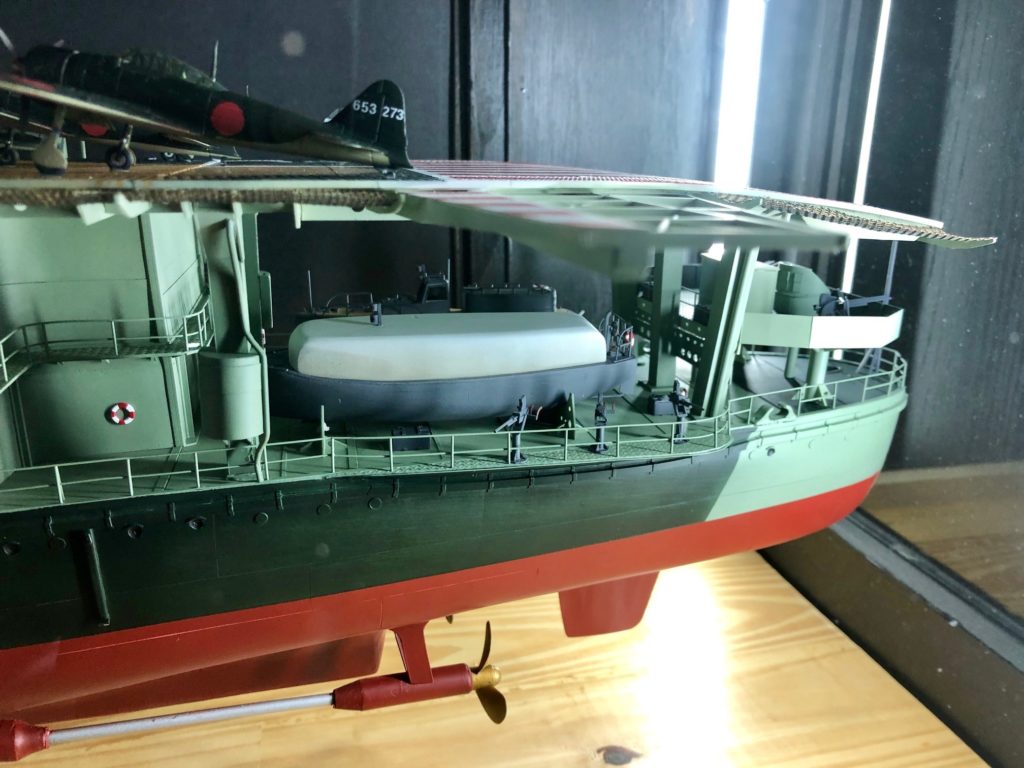
I had only completed a single motor launch at this point so I finished the second boat to complete the set under the aft flight deck. I also completed the life rings at this point. I figured on 5 per side of the Zuiho and one for the newly commissioned motor launch. These are easy to construct, but the small size makes filing, sanding and painting a tricky undertaking.
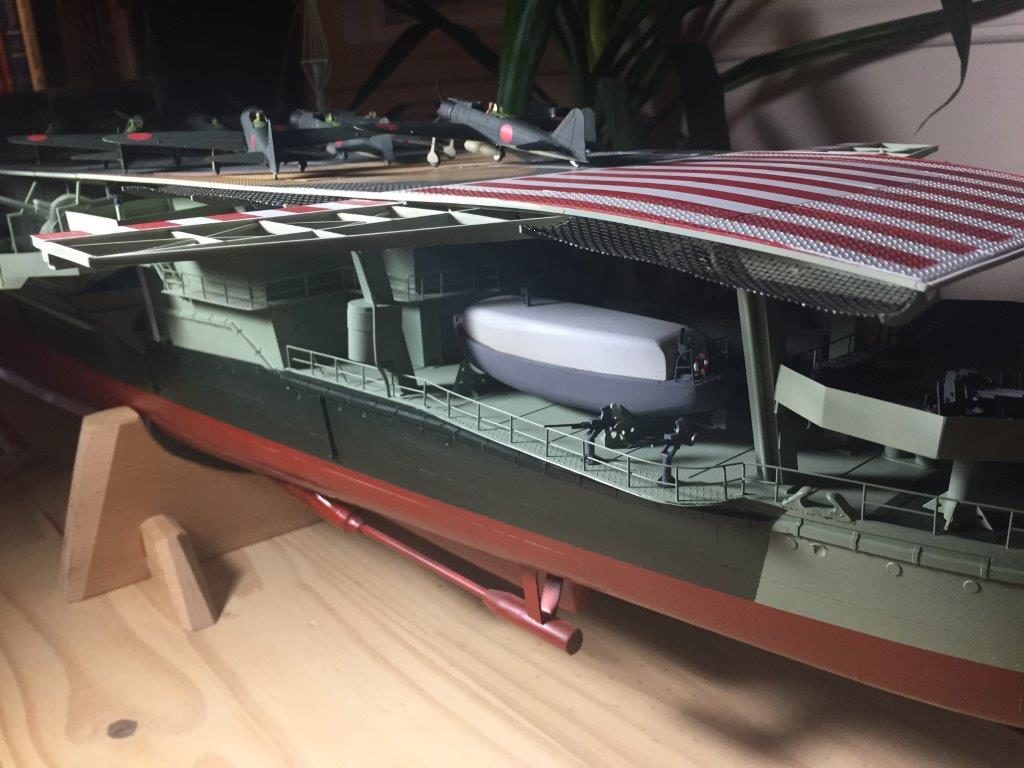
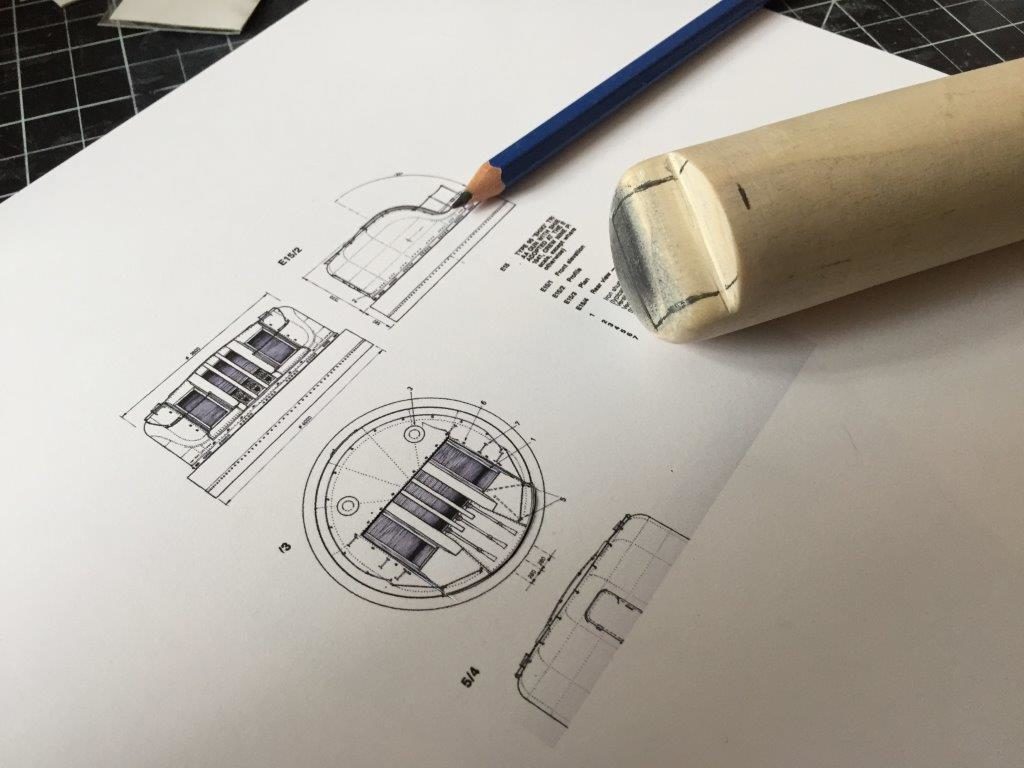
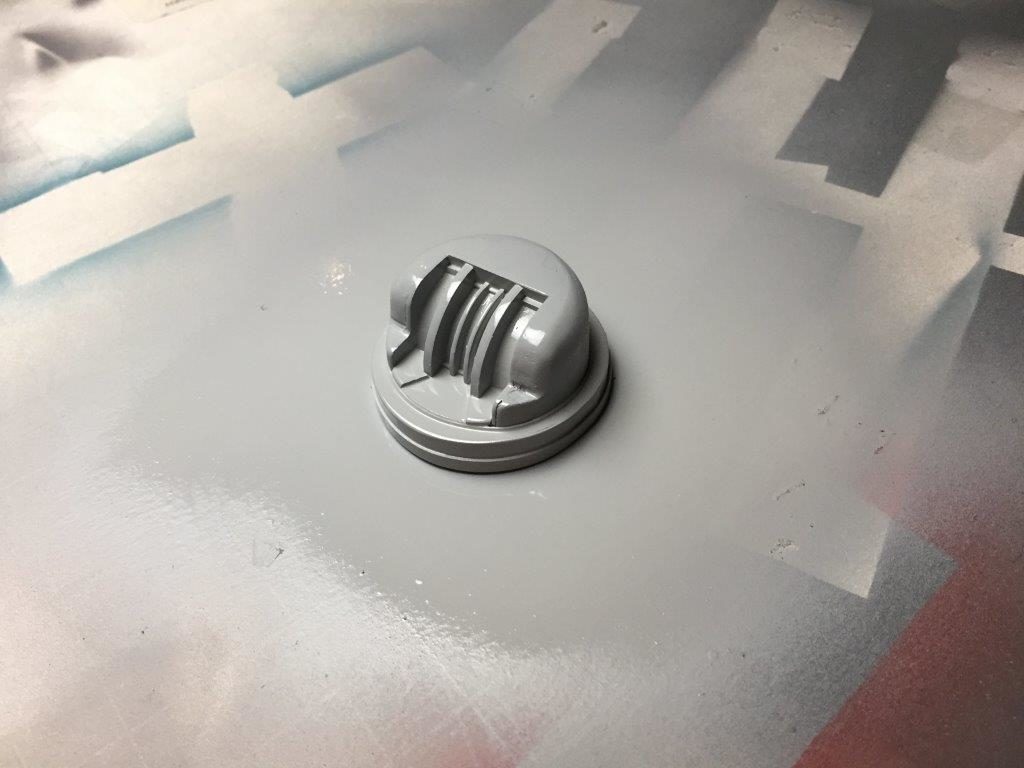
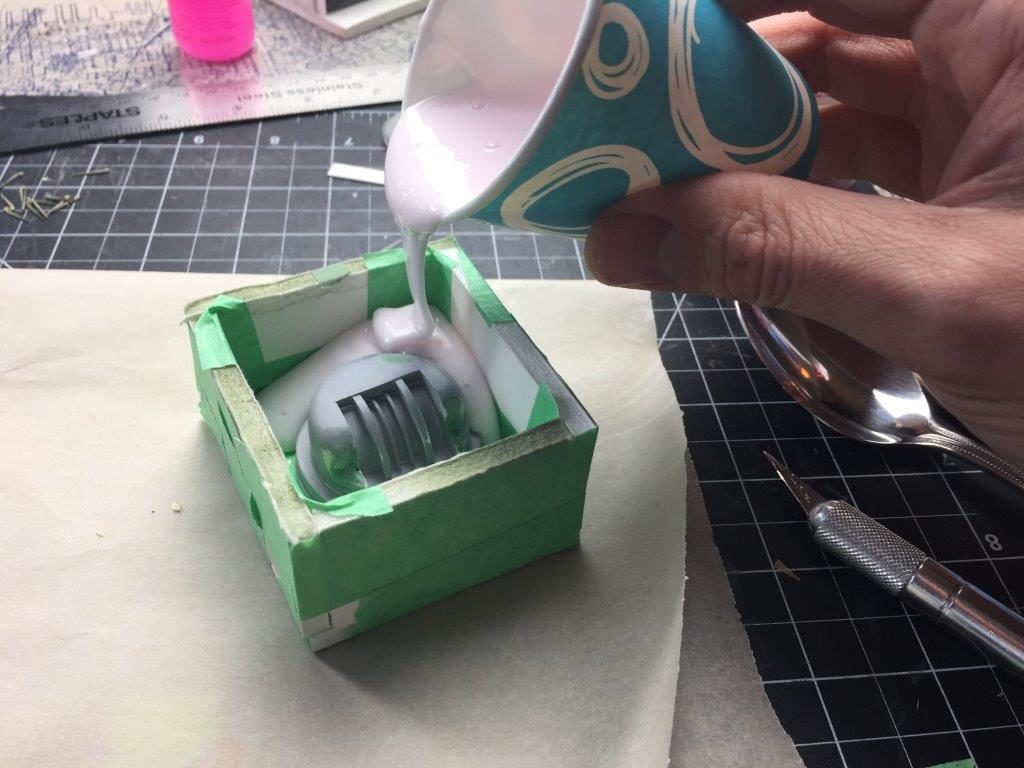
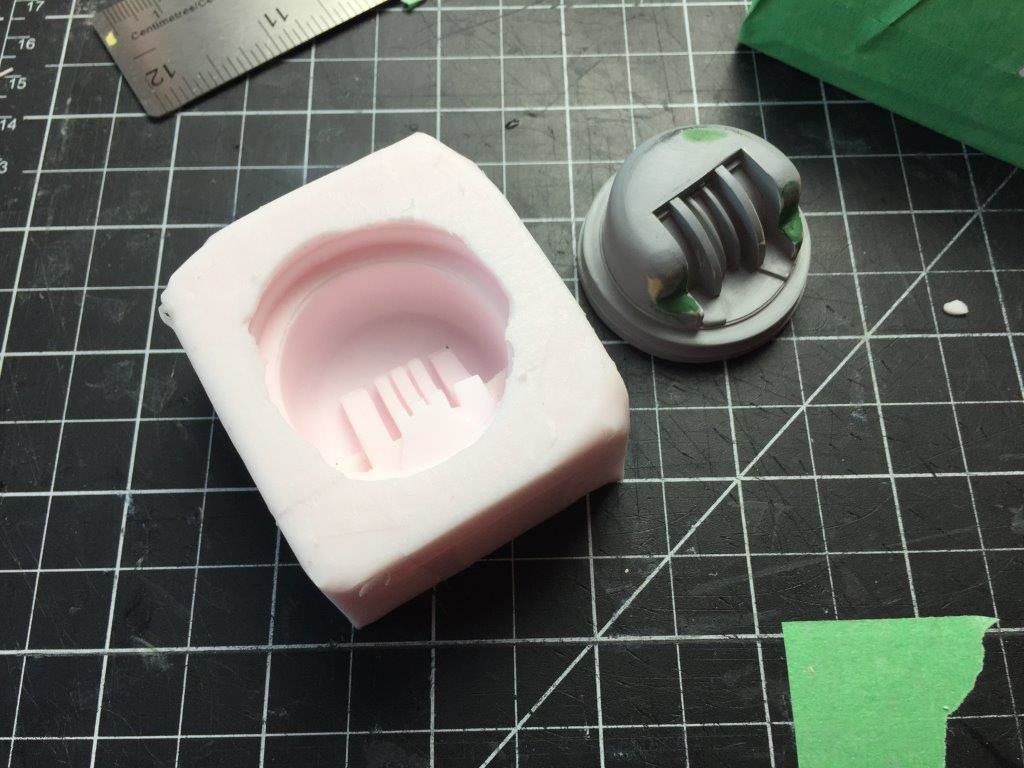
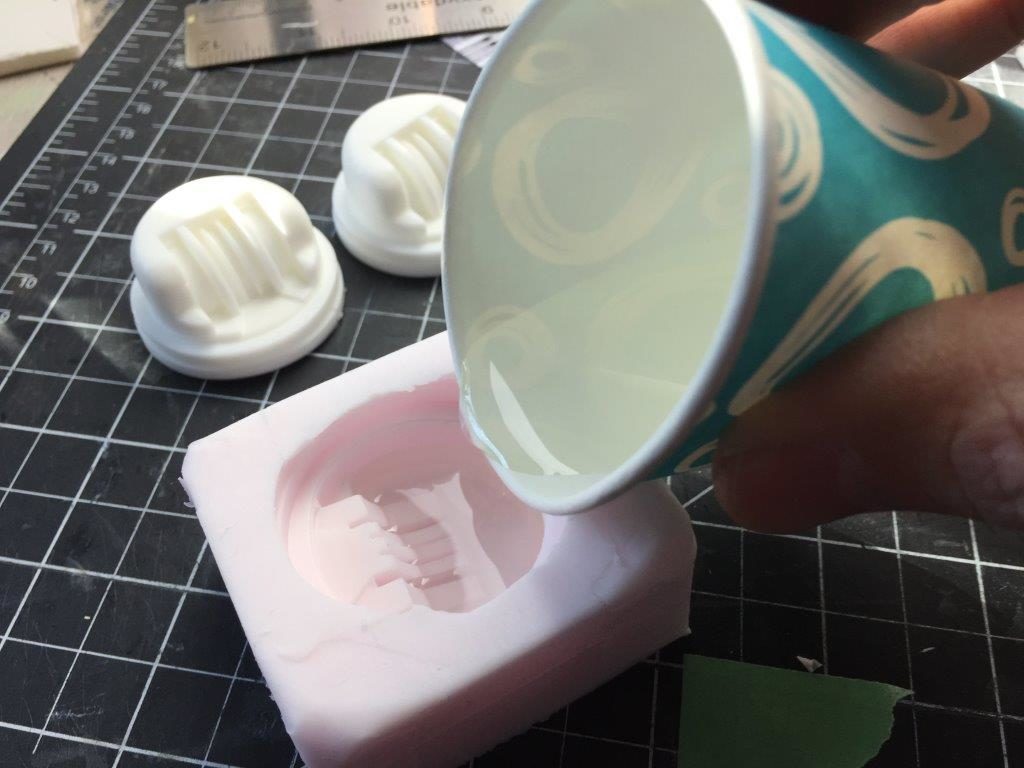
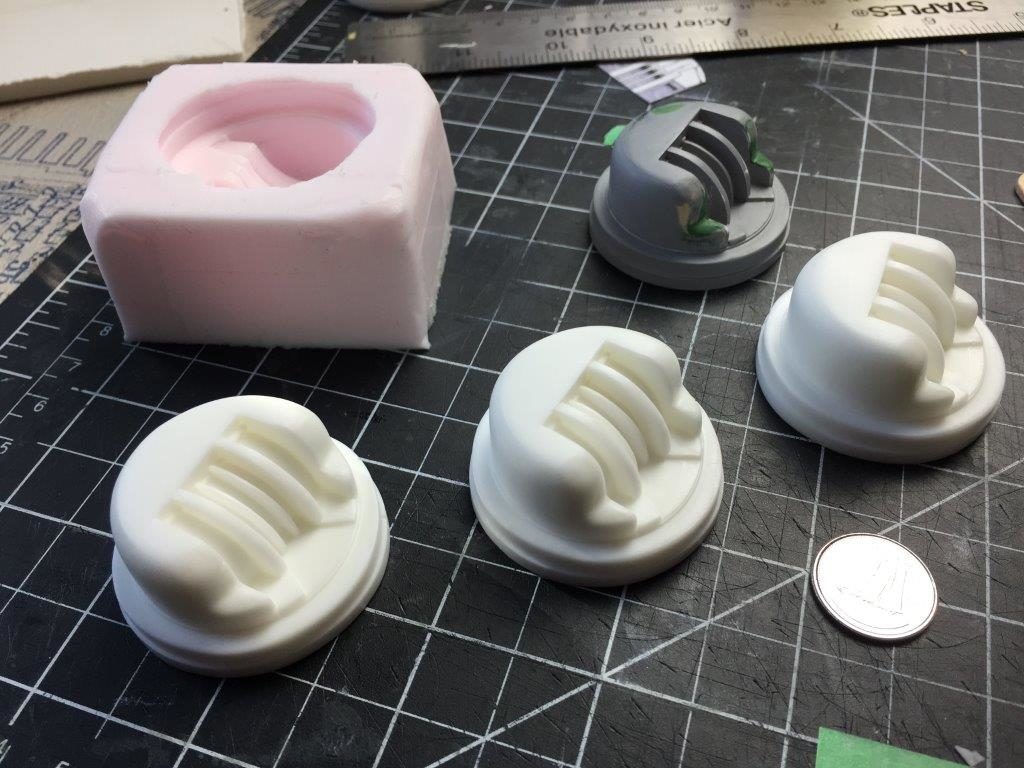
I was left to finish the 3 smoke shielded triple 25mm mounts. These had been left to the bitter end because I didn’t know how to easily tackle them. They were small and had curved and rounded tops which would be difficult to construct in styrene and making three of them in wood would be challenging, because they needed to look identical as they were right next to one another. I toyed with the idea of building a mold and then vacuum forming three mounts, but decided against that as I would need to either buy or build a vacuum form table. I decided to work with building a rubber mold and resin cast the three mounts from a model (first time resin casting for me). I also decided to use the same method to redo the two cutters I spoke of earlier in this lengthy dissertation. The cutters I originally built were planned to be covered in canvas (so they didn’t need to be hollowed out and detailed), but every single picture of cutters on Japanese ships I had seen since showed that they are open to the elements and never covered when stowed. I must say, being a newcomer to resin casting, using resin was really cool and quick. Although it costs about $40 for both the rubber mold and the resin casting, I was finished all three triple 25mm mounts in about 20 minutes time and they looked really, really good. Building them from scratch would have taken me at least an hour each and they wouldn’t have been absolutely identical. Very impressive!
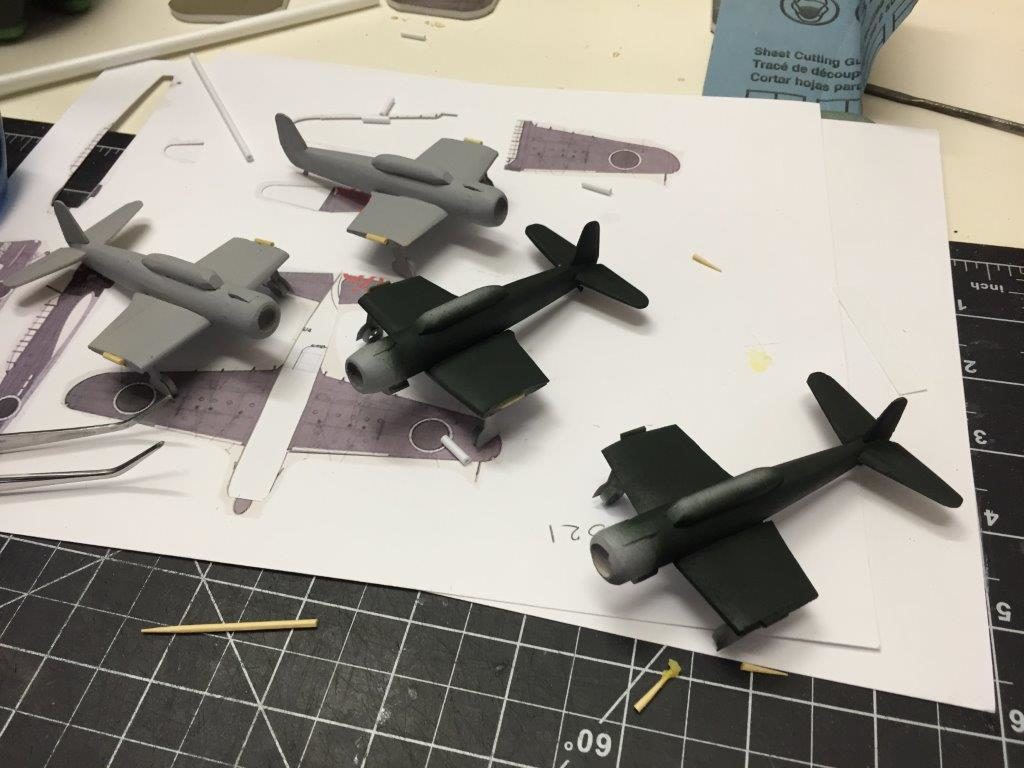
When I repainted the 12 Zeros fighters IJN Green I needed to apply the correct tail numbers to reflect the Zuiho air group (the painted over originals were of the Akagi air group in 1941, and would have had to be replaced anyway). The numbers are SMALL: 3/32″ (3.5mm) tall in the 1/100 scale. I was contemplating the forbidding option of cutting a template out of tape and paper and then happened upon the discovery that I could buy decal sheets of numbers in the exact size I needed. I sprayed all 12 aircraft with Future to provide an easier surface to glide the decals on to.
I then sprayed the entire ship down with Tamiya Dullcoat spray paint to protect the ship and remove any sheen left over from the application of the Future coats. I added the clear styrene to the bridge windows and to the windows of the smaller of the aft two motor launches.
The decal delivery was a bone of contention during the final stage of the build. They were ordered from a company in Atlanta. They were ordered on the same day that I ordered the propellers from a company in the UK. Two week later the propellers were delivered, but still no decals. Another two weeks and still no decals: I had many things to do on the ship, but I was anxious to complete the planes because so many things could not be done until the decals were in place: apply the decals, dull coat the planes, attach their canopies, affix the planes to the flight deck, run the wiring for the motorized planes, glue the deck to the ship, attach the ship rigging, attach the aircraft beam-side catch nets. I could not finish the build for lack of decals. I went so far as to place another order for decals from a local hobby shop in the nearby mall. With my luck they will all show up on the same day and I will enough have gothic number decal sheets to last me until the day I die!
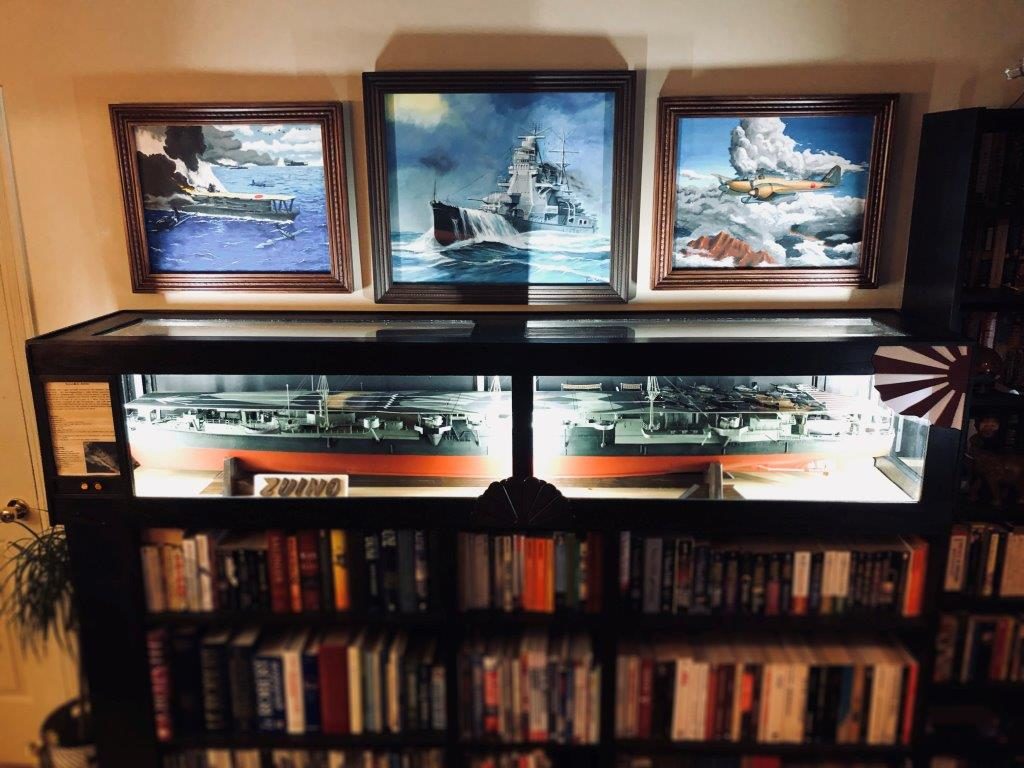
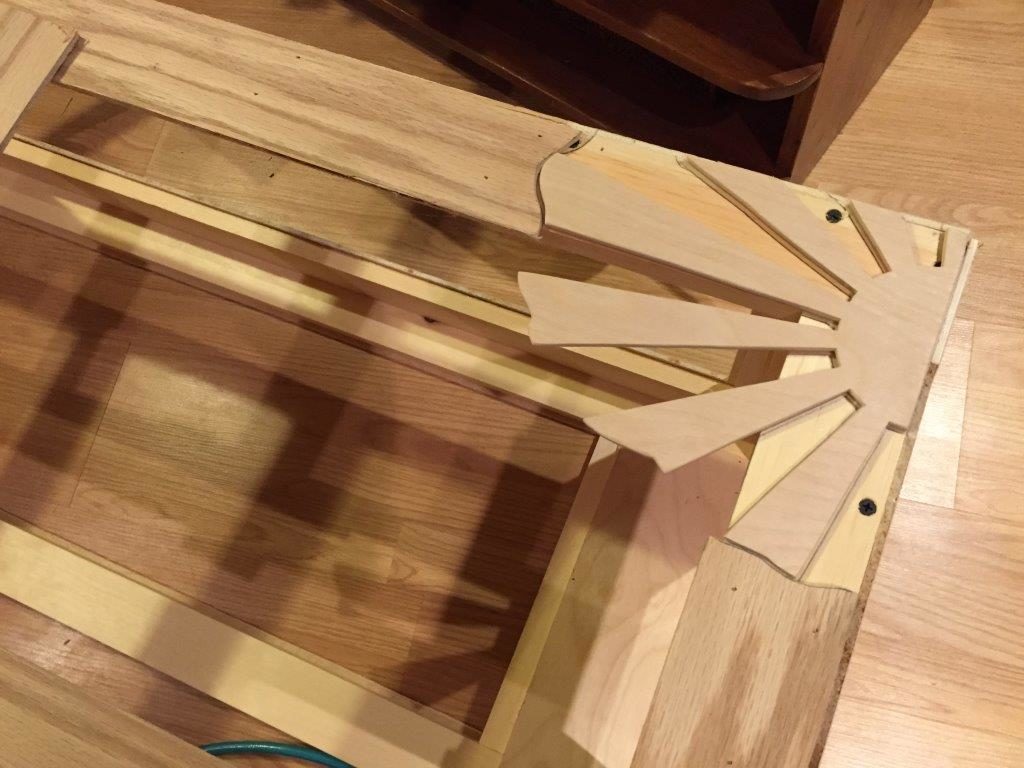
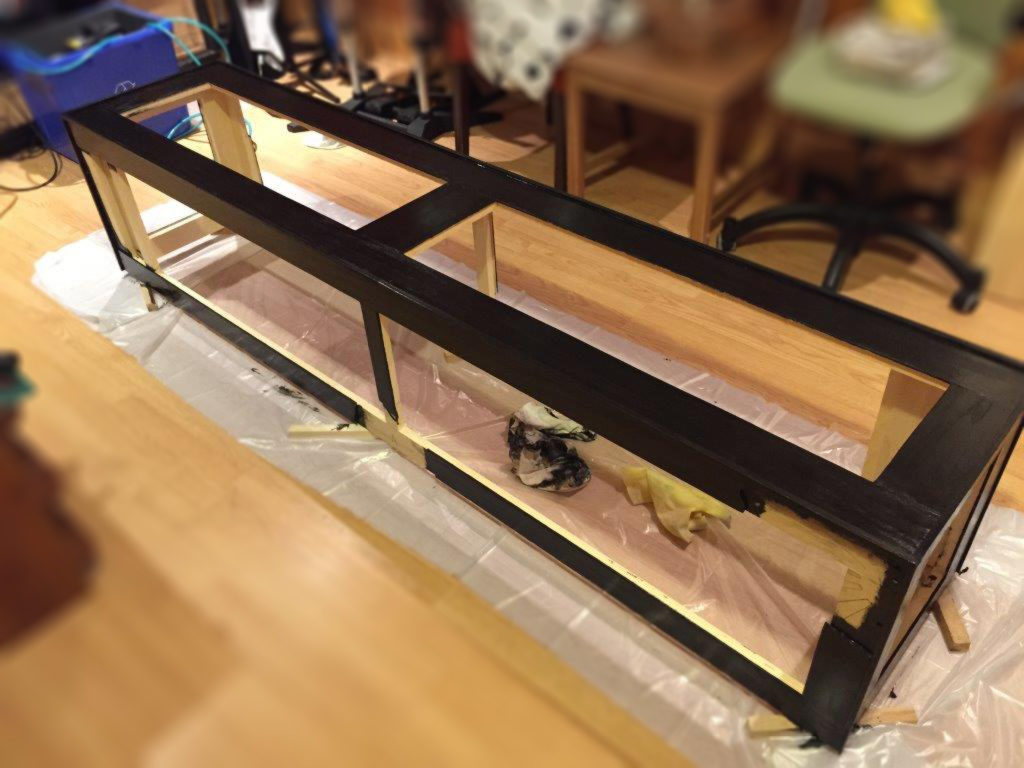
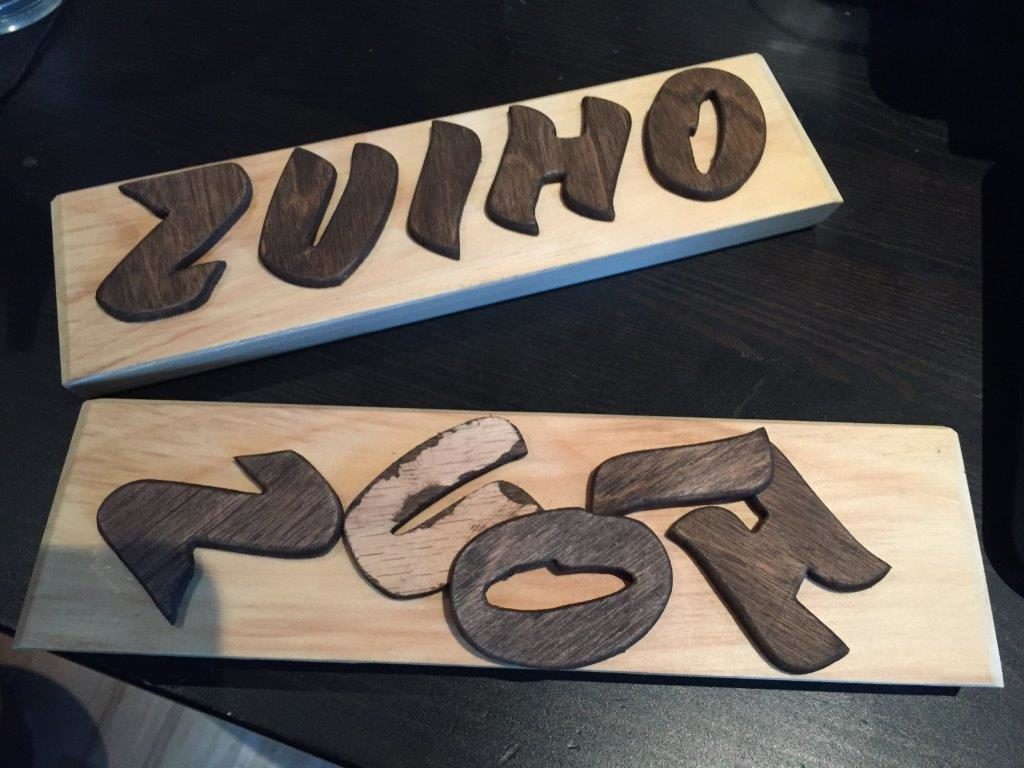
At this point, the only thing I could do was move onto building the display case for the ship. I opted for wood and glass and had decided long ago to put my woodworking skills to work and really decorate the box: with a rising sun, chrysanthemum, the ship’s name in English plus a little write up on the ship. I ran LED light strips (three per side) with two switches to turn on one side or the other or both. The case was stained black, but so the brown of the wood would still show through. This allowed the display case to match the rest of bookcases in my office.
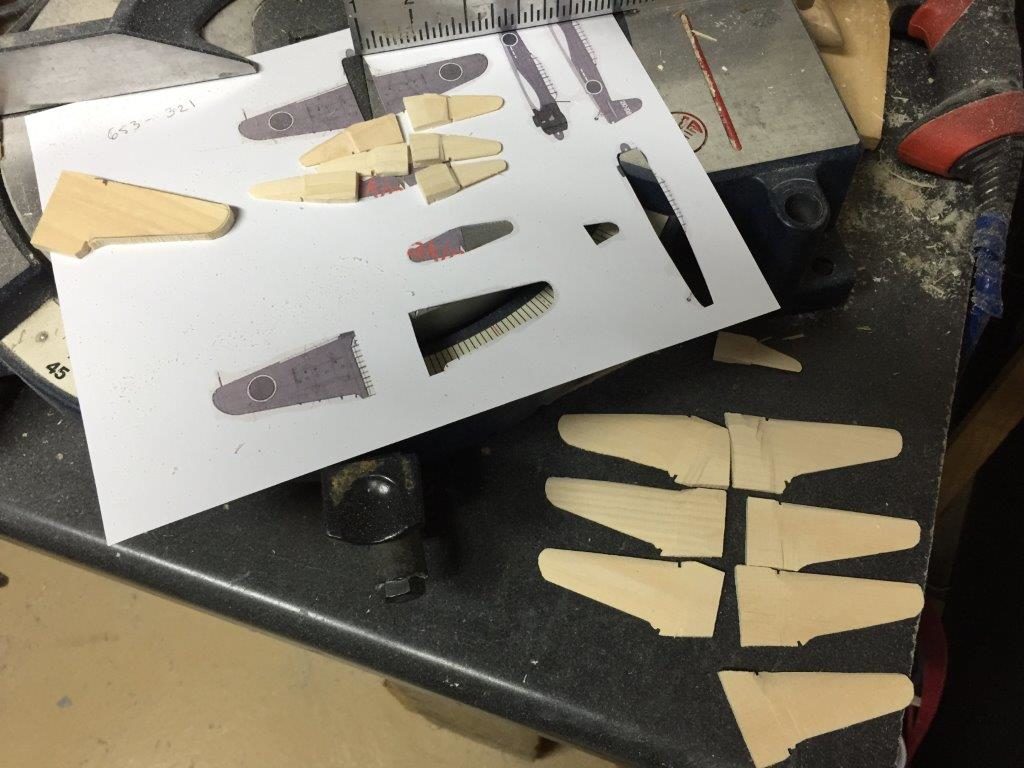
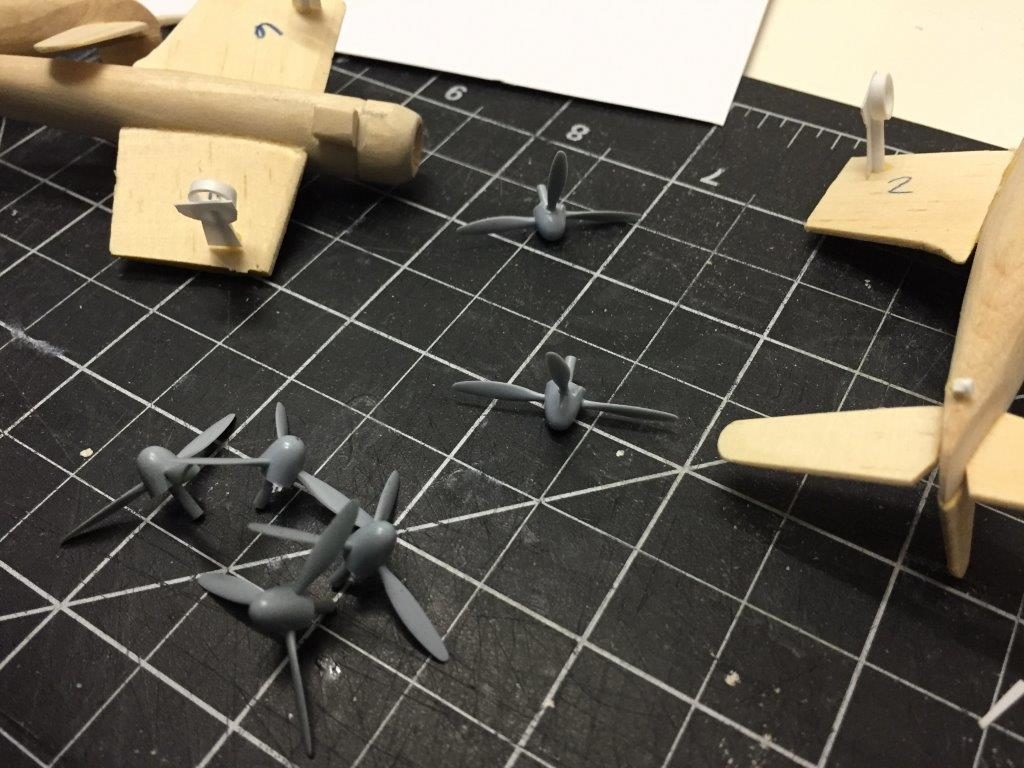
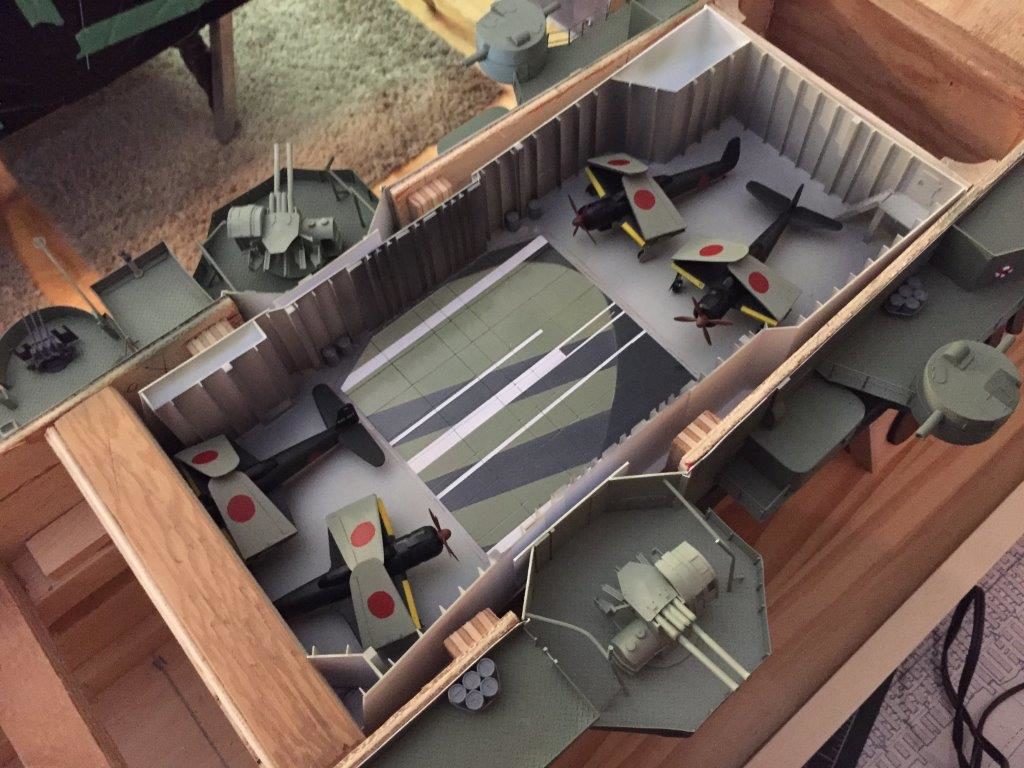
While still waiting for the decals I decided to scratch build four Jill torpedo bombers for the hangar deck (to be seen when the elevator is in the down position). I figured they wouldn’t have to be super detailed as they would be partially obscured within the hangar. My band saw and table sander came in quite handy on these planes. The two Doyusha kits that furnished me with the twelve Zero fighters provided an unexpected bonus I could use for the four B6N bombers I was scratch building: Each Zero came with three propellers, so I effectively had twenty four spare propellers. It took about 20 minutes to cut six of these up and convert four of them into the four bladed propellers I needed for the “Jills”. After paint and some details they are ready to go!
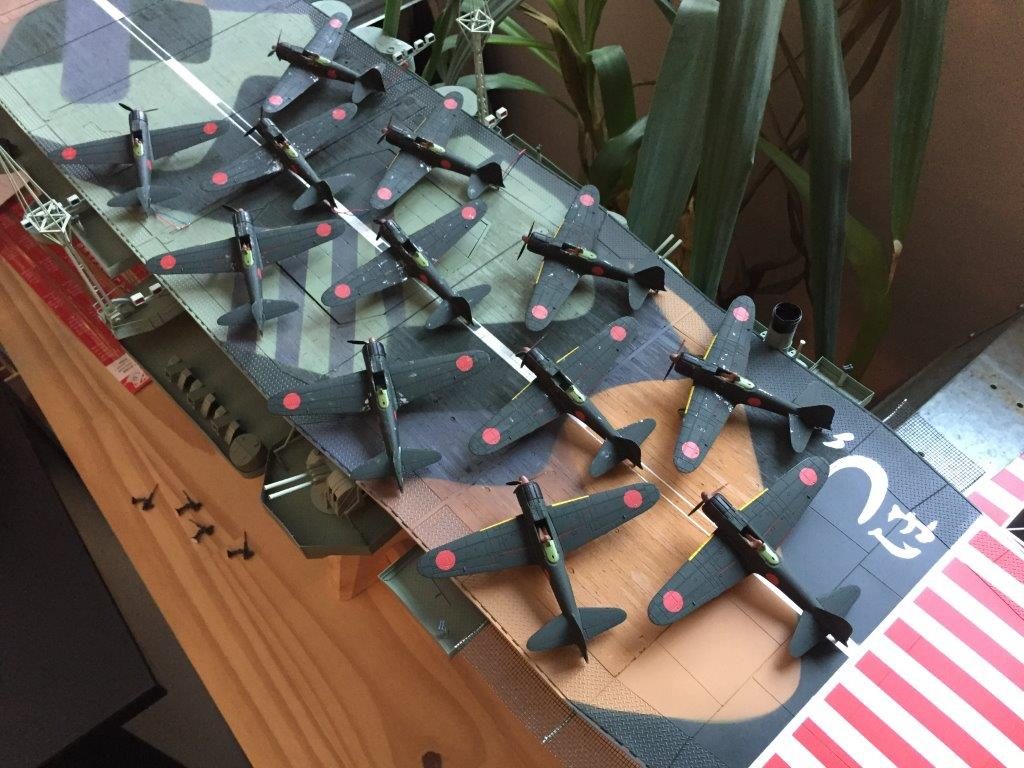
Finally! The decals arrived 2 days shy of a month since they had been shipped. They were dry transfer decals and were applied with some necessary patience and expected frustration, but done they are! All the aircraft were given a coat of dull coat and the canopies were affixed to the Zeros.
I ran the wiring for the four motorized Zeros through the flight deck, through the hull and through the ship stand. The batteries and the switches would be located on the display case with the ability to access them easily while making them as invisible as possible.
The second last item was to glue the flight deck permanently to the ship. This was done with some pomp and ceremony (in my own head).
The final task was the addition of the rigging between the antennas and to the ship itself. I opted to use steel “music rods” for this as the styrene rods sagged considerably and I didn’t want to glue them taut and possibly pull the antennas over. The steel also proved very ridged and stayed straight as an arrow.
The ship is proudly berthed in my home office so I need to walk past her every day. I make sure to salute her (in my head) as the four foremost Zeros warm up their engines in preparation for takeoff!